 Retro
Retro  Country
 Modern
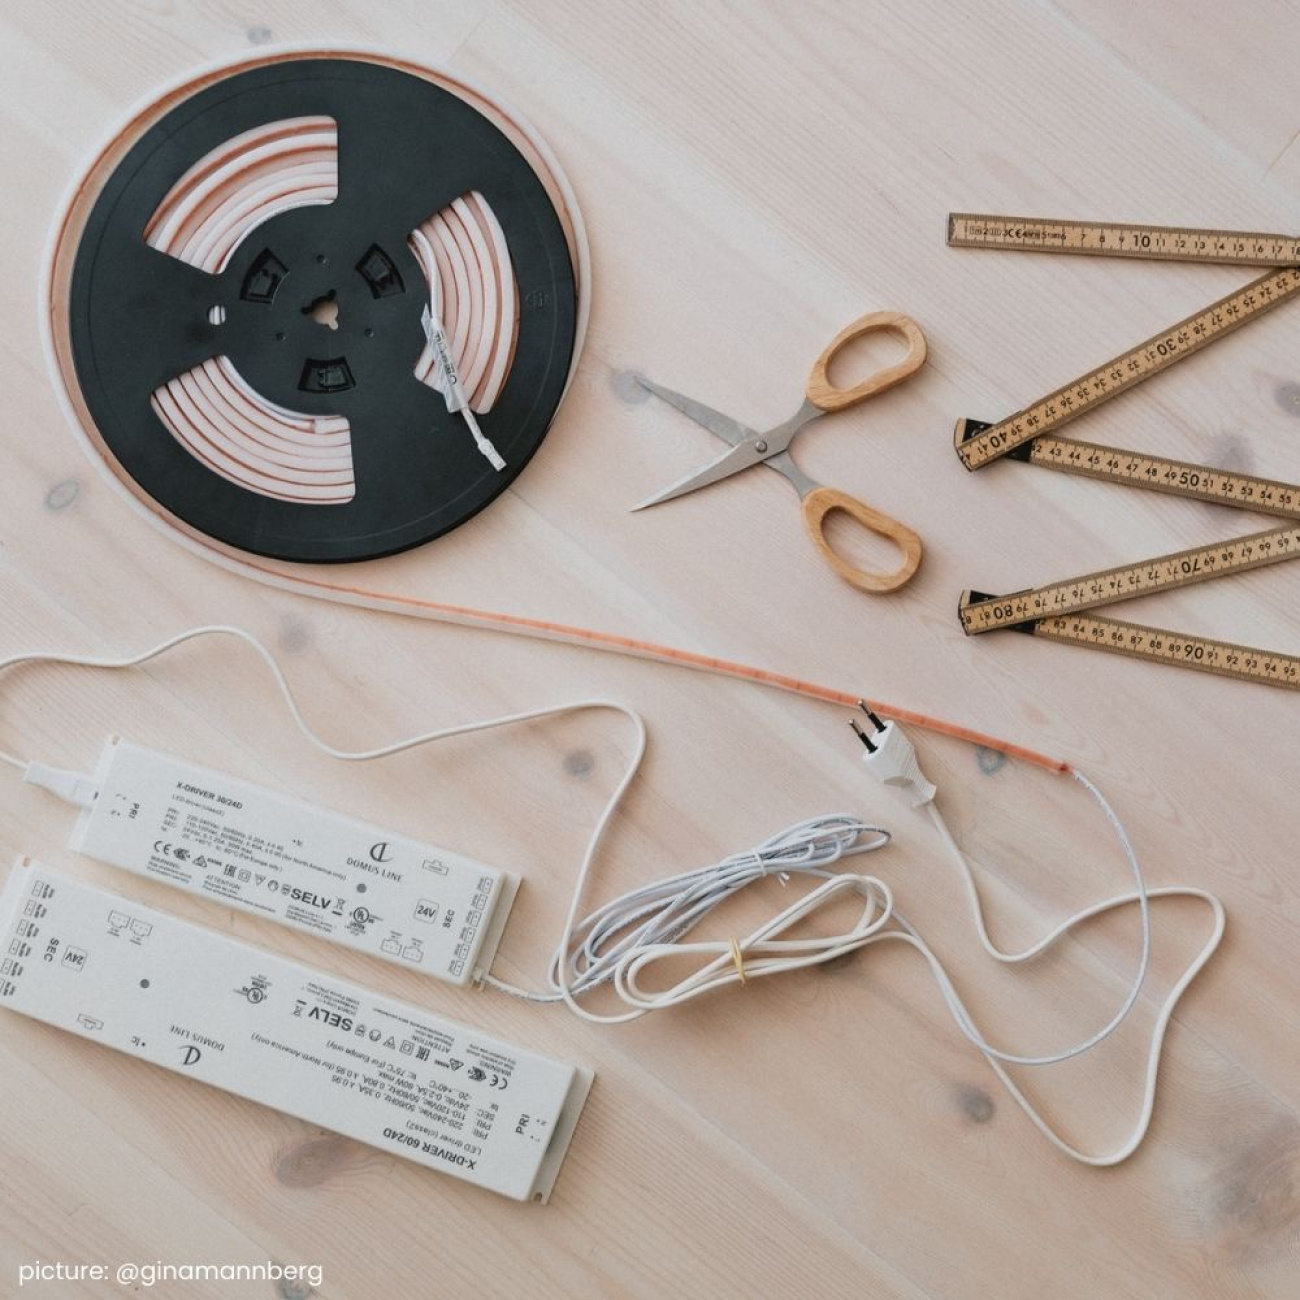
What is the difference between a surface-mounted or recessed profile?
When it comes to surface-mounted LED profiles, it's just as it sounds, you do not need to mill grooves to mount them. It is excellent to attach the LED profiles with the included 3M tape, screws or smart clips, depending on which LED profile you choose. Examples of our surface-mounted LED profiles are; LD8104, TWIG XA and Blade. A recessed profile is made for mounting in milled grooves at the selected location. The beauty of recessed profiles is that the LED profile ends up in harmony with the material to which it is attached. With a smooth click-mount where mounting takes place either with the help of a light push up, or with clips that are attached to the profiles before they are pressed into the groove. Most LED profiles are equipped with grooves that allow them to stay in the milled-out groove, without having to screw or glue. Examples of our recessed LED profiles are; Apex and Miss.
The difference between continuous grooves and blind grooves
When you talk about continuous grooves, you mean that it is a track that goes from one side of the material to the other without stopping. For continuous grooves, therefore, end caps are not needed to make the rounded locks that usually occur when using blind grooves. A blind track, on the other hand, does not go from side to side of the material, but it can start and end where you feel you want to. For example, 30mm in from the bottom of the wardrobe and 30mm from the top of the wardrobe. For blind grooves, it can be good to finish the profile with end caps, which creates a nice whole for the LED profile and which also hides the rounded end of the milling.
When milling the grooves, we recommend that you use an overhand cutter or similar machine to get a fine precise groove. In case of doubt, we recommend that you talk to a carpenter. This step is crucial for the profile's fastening ability and for the profile to be held up in a nice and good way. - When installing surface-mounted lighting, this is not necessary.
When milling the grooves, we recommend that you use an overhand cutter or similar machine to get a fine precise groove. In case of doubt, we recommend that you talk to a carpenter. This step is crucial for the profile's fastening ability and for the profile to be held up in a nice and good way. - When installing surface-mounted lighting, this is not necessary.
Placing
Start by thinking about where you want to place your new LED profiles and what you expect from your new lighting. Are you looking for more lighting in the kitchen, in the closet or in the display cabinet? Feel free to measure how long you want the profile to be, our LED profiles have the size 2000mm and you can decide for yourself how long you want it to be by sawing off to the desired size, so you get it exactly as long as you want.
Straight or angled profile?
If you want the light to shine, for example, in a kitchen cabinet or kitchen drawer, on the clothes in the closet or on the wall, we recommend that you take an angled LED profile, examples of angled LED profiles are, Blade and LAB which are both available in light and dark performance. However, if you want a straight light, we have a few different suggestions, Apex, Miss, and 8112. For a more playful lighting that can be shaped as desired, we have Flexy LED AT6 which is easily mounted on top with 3M tape or easily pressed into milled grooves.
Find your new lighting
We have a wide range with different LED profiles for different styles, wishes and needs. Under the tab Lighting, LED Moldings & Profiles, you will find our various lighting solutions, moldings and profiles in different shapes, designs and sizes so that you can find what exactly suits your wishes. To make it easier, we have also put together lighting kits, which are complete with everything from LED profile to drives for a complete lighting.
1. Start by measuring the length you want the lighting to have. Feel free to use a measuring tape or ruler. - Now you have the dimensions that will apply to your lighting. Measure the same dimensions on your new products and make a mark on the underside, in a place that will not be visible when the lighting is later mounted.
2. Use the desired tool to cut the LED profile and lens hood where you made your markings, for example with a hacksaw or similar tool. The LED strips can be cut with scissors, but remember to only cut at exposed markings, otherwise diodes that have no connection will go out.
3. Now it's time to put the different parts of the lighting together and this can vary depending on which LED profile you have chosen. Below we explain how to assemble and assemble two different profiles.
Installation of your new lighting
1. Start by measuring the length you want the lighting to have. Feel free to use a measuring tape or ruler. - Now you have the dimensions that will apply to your lighting. Measure the same dimensions on your new products and make a mark on the underside, in a place that will not be visible when the lighting is later mounted.2. Use the desired tool to cut the LED profile and lens hood where you made your markings, for example with a hacksaw or similar tool. The LED strips can be cut with scissors, but remember to only cut at exposed markings, otherwise diodes that have no connection will go out.
3. Now it's time to put the different parts of the lighting together and this can vary depending on which LED profile you have chosen. Below we explain how to assemble and assemble two different profiles.
Apex LED-Profil
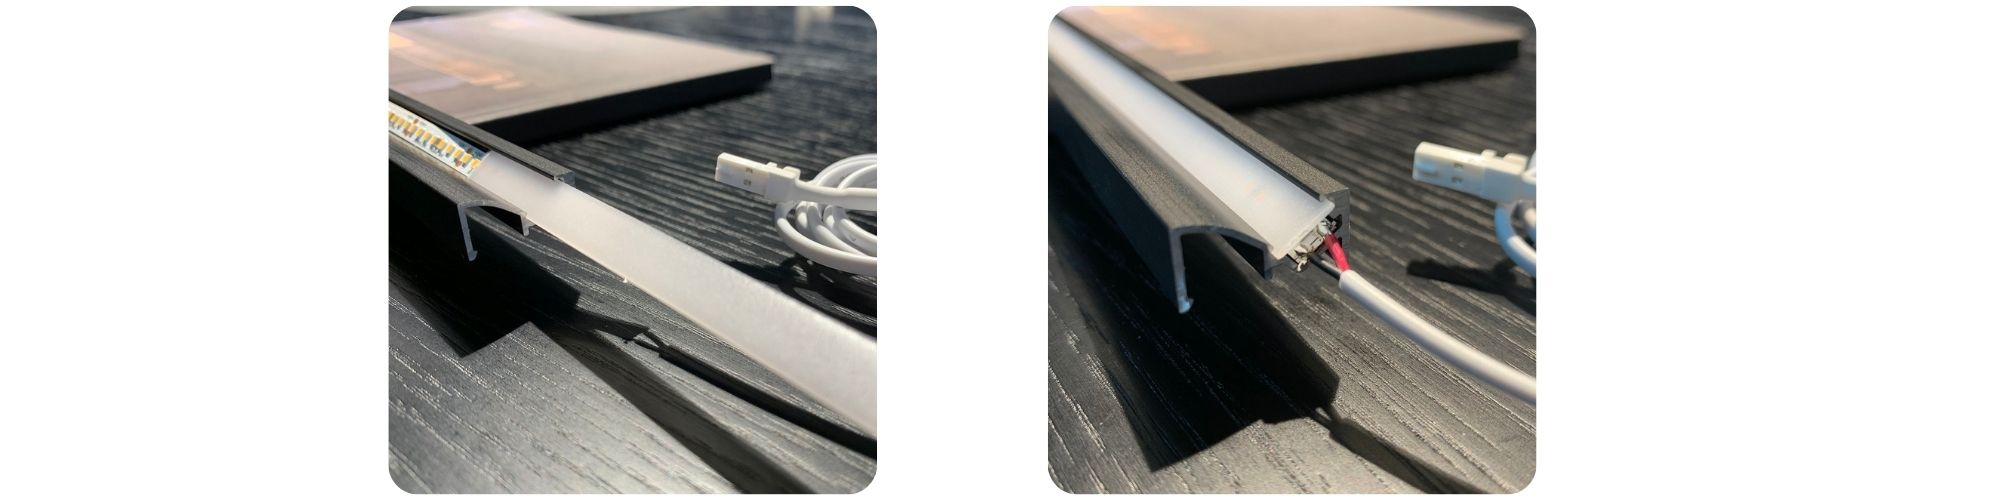
This is a recessed LED profile which together with our LED strips creates a homogeneous light without visible diodes. Apex gives a luxurious and elegant feeling and fits well in kitchen cabinets and drawers, in display cabinets and wardrobes.
1. Place the pre-cut LED strip in the Apex LED profile, there is a cut-out groove in the profile where the LED strip fits perfectly.

2. It is now time to choose the end caps, depending on whether it is a continuous or a blind track, the different ones are used. In End termination Apex 2p + 2p, both end terminations for continuous and blind tracks are included. Our other end terminations are made for blind grooves to hide the rounded end that becomes when milled.
3. Connect the drive with the LED strip to make sure that everything works as it should and that it is connected correctly.
.jpg)
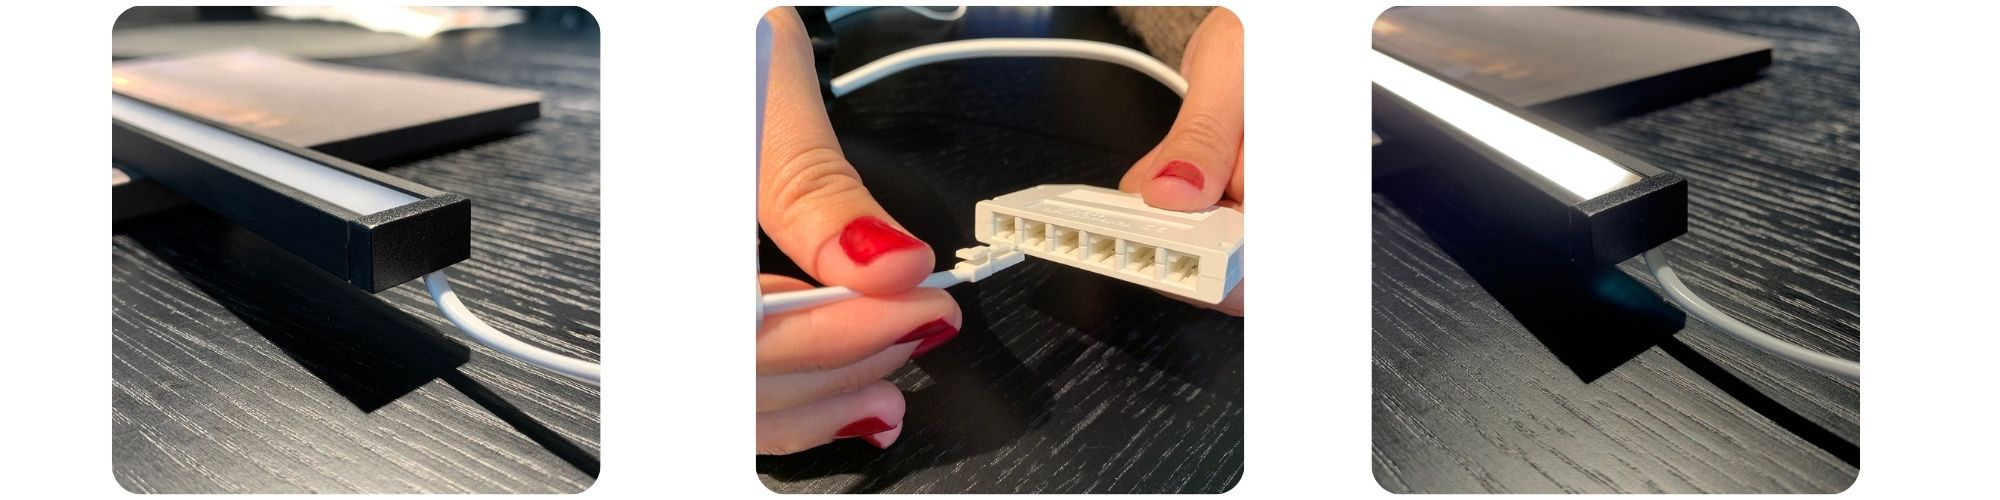
4. If the LED strip is lit, it is time to place the LED profile together with the LED strip in the milled groove. Here it is important to keep track of the cord and where you want it to go out of the track. Hide the cord in a nice way, for example when placing in closets, hide the cord by pulling it through a pre-drilled hole that goes up on the top of the closet.
5. Bring out the drive and switch on your now complete lighting. Measure how long the cord you have and where you can place the drive. If the cord is too short, we have extension cables.
6. Disconnect the products and place the drive in the desired location, then connect the profile to the drive. If you want to connect your new lighting to a wall switch, you must contact an electrician.
Enjoy your new Apex LED -profil!
Blade LED-Profil
Blade is a profile that is 10mm thick and designed for surface-mounted installation against the road, which is delivered with hidden party clamps. Blades are also available in complete sets, in two different designs, matt black and aluminum. Blade fits well in the kitchen to illuminate countertops or shelves.
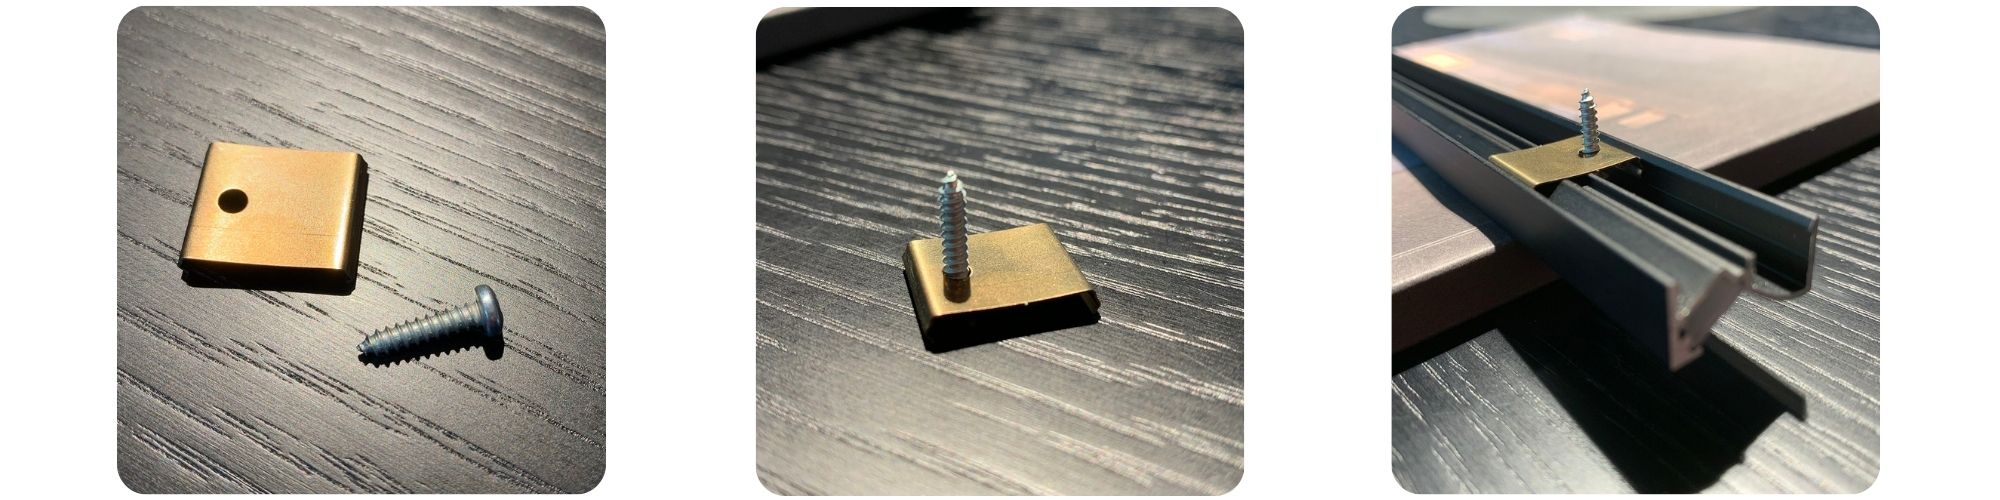
1. Use the mounting kit provided. The hidden fastening clamps are screwed up in the desired place. Pre-drill beforehand to facilitate the assembly of the fastening clamps. Screwdriver is preferable as it is difficult to get in with a drill and the feeling you have in your hands is more gentle on the products.
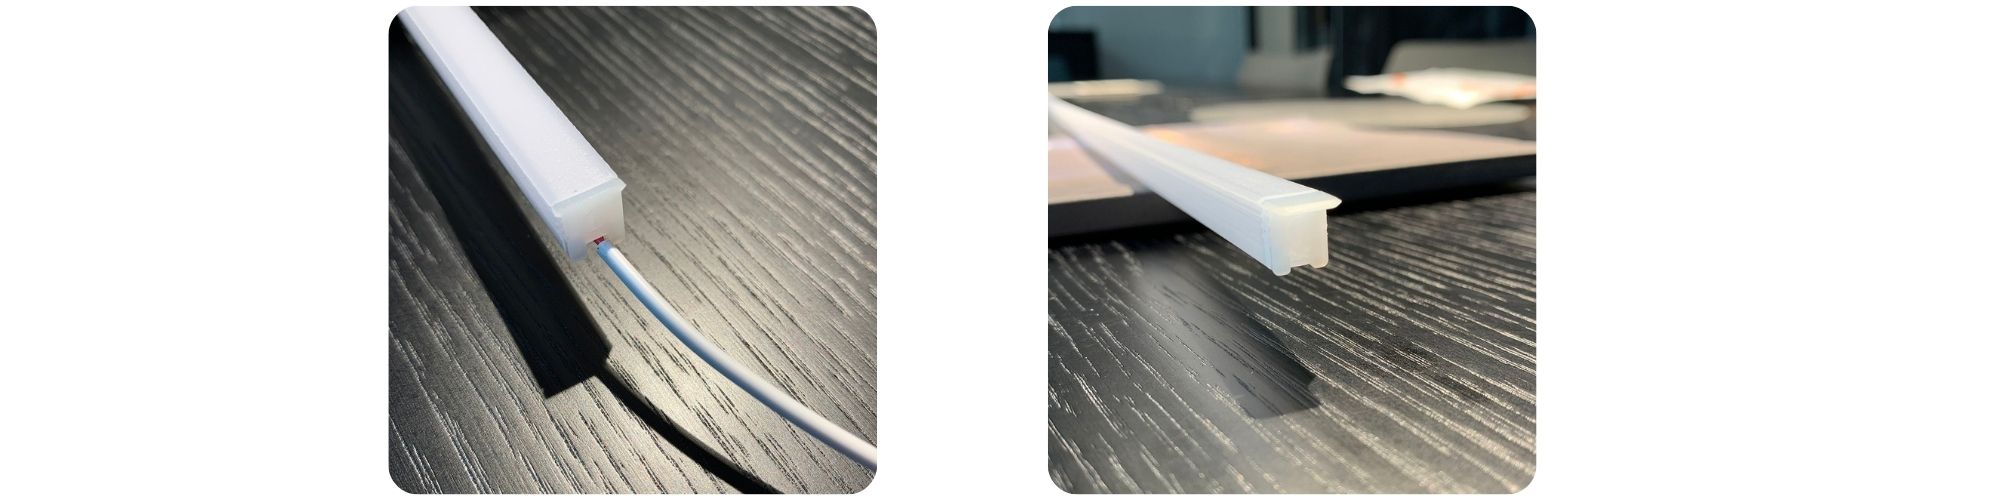
2. Place the prepared LED strip in the Base profile, where there is a groove for the LED strip to be placed correctly inside the profile, which facilitates installation. Feel free to measure out where you want the LED strip to be attached before you pull off the protective film on the tape, this to know how the diodes end up. When you have done this, peel off the protective film and stick the LED strip in the desired place, apply light pressure with your fingers to make sure that the LED strip sticks properly.
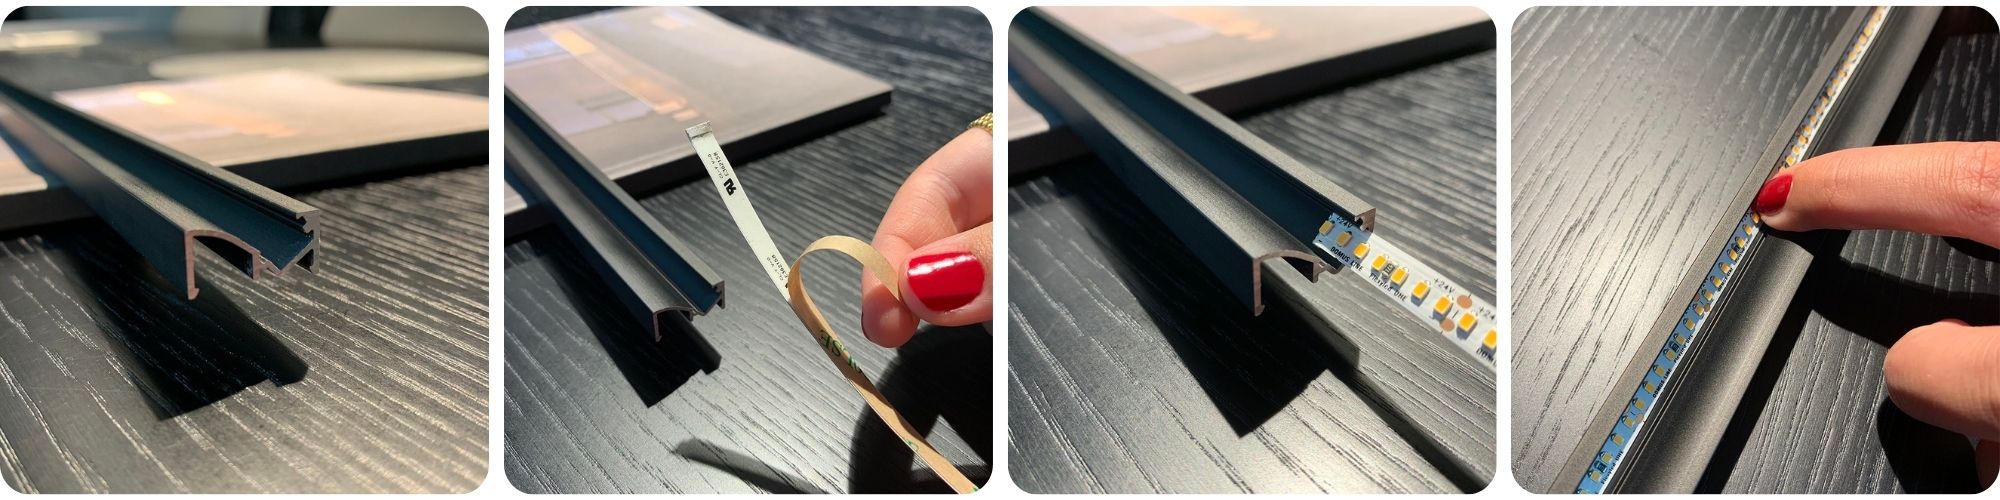
3. When the LED strip is in place, it is time to insert the diffuser into the profile, where there is another groove in which the diffuser fits.
4. Now we are going to look good for the edges by mounting on the end caps on the profile. These are easily clicked in on the side of the profile. Connect the drive with the LED strip when you have assembled the LED profile and the LED strips with each other, to make sure that everything is connected correctly. This is easier to do before assembling the product.
![]()
5. Also check where you want the cord to be placed, it is necessary to drill a hole, do this before mounting on the wall.
6. If the LED strip lights up when connected, it is time to attach the profile to the mounting clamps. Disconnect and click up the profile in the mounting clips.
7. Bring out the drive and switch on your now complete lighting. Measure how long the cord you have and where you can place the drive. If the cord is too short, we have extension cables. Disconnect the products and place the drive in the desired location, then connect the profile to the drive.
8. If you want to connect your new lighting to a wall switch, you must contact an electrician.
Enjoy your new Blade LED Profile!